Wednesday, March 30, 2011

Why Does Fat Taste So Darn Good?

A few weeks ago I decided to feed my cookbook addiction and purchased a new favorite. I was at Half Price Books and the temptation was too great. This new favorite is called " You've Got It Made" by Diane Phillips.
Photobucket

Every recipe that I have tried from this book has been great, but they all have a ton of  butter and heavy cream in them, so how could the not be wonderful? Why is fat so damn tasty? Of course, if it wasn't we would all be skinny with low cholesterol.

So far one of my favorites from this book has been the Tarragon Chicken Bake. It has everything you could ask for; pasta, sauteed chicken, and a tarragon cream sauce. Hello?? What could be wrong with it???

This amazing recipe is wonderful, but don't blame me when you get put on Crestor. :)
Photobucket

For this recipe you are going to need a ton of sliced mushrooms
Photobucket


And a pound of cooked egg noodles

Photobucket

First chicken is sprinkled with salt and pepper and browned in a skillet. Once each side is browned, remove the chicken to a plate and let it cool.


Photobucket

Add garlic and shallots to the pan and saute until softened. Then add the ton of mushrooms.


Photobucket

After the mushrooms start to color a bit sprinkle them with flour and cook for 3 minutes.


Photobucket

Add chicken broth, then mustard, cream,and tarragon and simmer for 5 minutes.  Let the sauce cool.


Photobucket


Put the noodles in a 9*13 pan, lay on the chicken and top with the sauce. There is an optional topping of buttered breadcrumbs  oil and tarragon that can be sprinkled across the top. This final touch really brings out the tarragon flavor and send this over the edge. YUM!


Check out other posts like this one at Wanderfood Wednesday and Welcome Wednesday bloghops.

Dining With Debbie

Tuesday, March 29, 2011

David Does Vegas

My husband just got back from a work trip to Las Vegas. After looking through his pictures I think he ate his way through town. There is no doubt we are a match :) These are just a few of his pictures from the trip.


He ate at several of Wolfgang Puck's restaurants. He even ate red onions on a burger which is a big deal for him. Of course it was a Kobe beef burger, so anything would have been good on it.
Photobucket


Checked out a bedazzled McD's
Photobucket

And found his favorite restaurant hidden in the Mirage. The restaurant is totally hidden so you kind have to know to look for it.  He has raved about the New England Clam Chowder at this place since I met him. Every year he goes back for more. Someday I will get the recipe and surprise him with it.

Photobucket

While I am totally jealous of the good eats he had, I am glad I didn't have to sit through hours of training to get them. One day we will go and eat our way through that town. I am thinking in about 15 years.

Monday, March 28, 2011

Cooking with my Kids- AHHHHHH

Ok the title of this post was a bit of an exaggeration. My oldest daughter really is a pretty good helper in the kitchen and does a great job. I really need to start giving her more responsibility in the kitchen so that she can learn to cook for herself someday. You know, that whole growing a productive human being thing. It sucks sometimes.

Last week I received an email asking if I would be interested in blogging about a new healthy Monday campaign, Kids Cook Monday. Kids cook Monday is trying to encourage getting kids in involved in the kitchen and family dinners by having them help prepare the meals and starting off the week with a sit down family dinner. The campaign organizers are looking for bloggers to write about family dinner nights and recipes.  Well, that pretty much sums me up. We sit down as a family to eat together and talk about our days most nights. It's the one time when my kids sit still and talk to us and not AT us.

There is a ton of great reasons to  have your kids help out in the kitchen. They are more likely to eat what they cook, food tends to be healthier when it is homemade, teaching math skills, and parent/child bonding time are just a few. My personal and totally selfish reason is because the more I teach them, the less I have to do myself.. I seriously have a master plan where the kids will take over all the household duties and I will just manage and delegate while sipping a mojito. Yes, I realize that is totally not going to happen and not the point, but every middle aged housewife has a dream and this is mine. Realistically, I want them to be able to take care of themselves when they aren't with me. I don't want them bringing me their laundry and asking me to fill their freezers when their 30, so might as well teach them young!

I decided to kick this week off with a bit of a cheat meal. I found myself with a ton of bread leftover from a batch party earlier in the week, so I decided that a wonderful french toast casserole would be the best use for it. There are several great recipes in a cookbook I found called , You've Got it Made by Diane Phillips.

The first one is a triple chocolate french toast. I didn't have 3 kinds of chocolate on hand so it is all semi-sweet, but other wise we followed the recipes pretty closely. Ashley ( my oldest) has enough experience in the kitchen that I was able to just hand her the cookbook and let her go to it (with a bit of direction) while I did some other cooking in the kitchen with her. She is almost 11 and really loves the independence and feeling like she did it on her own.


This french toast recipe started with 8 eggs, but we used eggbeaters to try to combat some of the fat coming later.

Photobucket


Yeah that fat? Here it is- 2 cups of heavy cream.
Photobucket

Oh and you can't forget the cup of sugar.


Photobucket


And the ton of bread
Photobucket


Ashley favorite part was adding in the chocolate chips.
Photobucket

She mixed it all up in the bowl in spread it in a 9*13 pan. We covered it in Press- n-seal and then a layer of foil  before sticking it in the freezer until her birthday morning in a couple weeks.
Photobucket

The next recipe was a PB&J french toast. We decided that this would be a could breakfast to have the morning after her dad returned from a week long work trip. He usually handles weekend breakfast duty, so this would give him a chance to relax his first morning in.
 Basically she started by mixing the bread in with the custard she had made of  egg, peanut butter and cream. This was fun for her because she got to use my Kitchenaid stand mixer that NO ONE gets to use. :)  Then she put half of the bread mixture in the 9*13 pan.

Photobucket

Then she dotted the top with Raspberry preserves and spread it over the bread. Then she topped it with the other half of the bread mixture.
Photobucket

Ashley sprinkled peanuts over the top as a finishing touch. She was very proud of her dish and could wait for her daddy to see it!
Photobucket

Oh and we also learned the important lesson of labeling things. There is nothing like pulling a tin of "mystery dinner" out of the freezer.  Sharpies are our friends. She even included the cooking instructions  so we wouldn't have to look for the book.


Photobucket


I wish I could say that I have a finished product picture of this, but I don't. My husband nicely let me sleep in on that morning and when I got to the kitchen, the entire pan had been pretty much devoured.  There was a corner left for me, but it had obviously been a big hit.   The consistency was more like a bread pudding than a french toast, but the flavor was great. It was not nearly as sweet as I had expected, but that may have been because we used natural peanut butter with no sweetener and sugar free preserves. It was definitely sweet, but not send you to the dentist immediately sweet.

Hopefully I will be able to get a finished product picture of the Chocolate French toast to post. Until then get your kids in the kitchen! Someday it might help you get an evening off.


Photobucket Photobucket

Sunday, March 27, 2011

Week 13- Clearing the Freezer

Yes, I know I skipped a couple weeks, but we are going to let that pass and move on. :)

This week I am dedicated to spring cleaning my house and my freezer. I have been on a cooking spree lately and both of my freezers are stuffed! It will be nice to take a week to eat some great premade stuff and make room for some new goodies. Also, it would be nice to be able to open the freezer without fearing for my toes.

Monday-   Curried Lentil Soup
Tuesday - Honey Sesame Pork Chops
Wednesday - California Thai Sirloin
Thursday - Ham and Potato gratin
Friday - DATE NIGHT!!!

That is my simple weekday plan. Hopefully it will make a little dent in the madness of my freezer and save my toes from harm.

Friday, March 25, 2011

Fish Friday- Mediterranean Halibut with Tomatoes, Mint and Feta

I have been working on sneaking more fish into our diets. The husband isn't really a fan of seafood and definitely doesn't like anything "fishy".  Creative recipes that disguise the fish flavor are a must.

Mediterranean Halibut with tomato, mint and feta definitely fit the bill. Halibut has a mild sweet flavor and the robust flavors of the tomato mint and feta really hid any chance of "fishy taste".   Ok,  yes I realize that halibut is super pricey. 2 fillets cost almost $12 so it is not an economical fish to buy for the entire family. Honestly, you could use any firm, thick fish. I bet cod would work well.

The tomato is oven roasted to really bring out the sweetness and aroma. The tomato is mixed with onion, garlic, mint  salt and pepper and baked for 15 minutes. The smell was incredible.

Photobucket

The fish was tossed in oil, covered with the tomato mixture and topped with feta before baking for 20 minutes.

 Photobucket

The finished product looked and smelled wonderful. I topped with a sprinkling of chopped mint when serving with roasted root vegetables.

Photobucket

This flavorful dish definitely worked for a healthy Fish Friday meal.


Mediterranean Halibut with Tomatoes, Mint and Feta

14.5 oz can diced tomato, drained
1/4 cup chopped onion
1 clove of minced garlic
2 tbls fresh mint, chopped
3/4 tsp salt
1/2 tsp pepper
1/2 cup olive oil
2 halibut fillets

Preheat the oven to 400.  Combine the tomato, onion, garlic, mint and  salt and pepper and pour onto a baking sheet. Bake for 15 minutes, until most of the liquid has evaporated.

Reduce oven to 350. Toss the halibut with the oil and  top with the tomato mixture and feta.  Bake for 15-20 minutes, until cheese is melted and fish is cooked through. Sprinkle with more mint and serve hot.


Check out some really great food pictures on Food Trip Friday. There is a ton of great fish ideas on there. This recipe is also linked up to Full Plate Thursday and Recipe Swap Thursday. There are some really yummy recipes!

Wednesday, March 23, 2011

Wanderfood Wednesday - Mini Shepherd's Pies

 Some of you may have noticed that I took a week (or two) off of blogging. When life gets busy something has to give and for me it was the blog. Sorry- life happens. When you have 3 busy kids, a start up cooking business and a strange desire to join your oldest kids school PTO board, it gets hectic fast. It a juggling act and sometimes a ball drops. Ahh what can I say, I am human.

Anyway, this week one of my clients made a couple of special requests. The first one was for the super yummy Moroccan rack of lamb with Shiraz Sauce. The second request was for a traditional lamb Shepherd's Pie. I decided to make a fun twist by going with individual pies.


Aren't they cute??


Photobucket

The first step was to make the tasty meat filling. I had some wonderful grass fed lamb from a friend of a friend's farm. I started by browning 2 pounds of ground lamb in an oven safe skillet. Next, I added in some sliced leeks and garlic. Chunks of turnips and carrots were added to give it a rustic feel. I sprinkled some flours over the top and stirred it in to coat the ingredients. I deglazed the pan with some beer - yes weird I know, but it sounded good at the time and worked out to taste great. Finally, I added some beef stock a couple tablespoons of tomato paste and  seasoned with salt and pepper. The entire skillet was placed in a 350 degree oven and cooked for about an hour.

Look how hearty and thick this looks. The flavors were very deep and rich.


Photobucket


I filled the individual pans about 3/4 of the way with the lamb and topped with creamy mashed potatoes. The little pies were put under the broiler to brown. 
Photobucket

Seriously, these are the times I wish I had a torch. How cool would it have been to been to brown the potatoes with a flame thrower??!! Plus, I feel like torch could really help me keep those juggling balls in the air. If not then my friend Gini over at Big Fat Gini Blog and I would have an awesome time perfecting our Beavis and Butthead impersonations. Until then, my oven broiler worked nicely.

Wander on over to Wanderfood to see some other cool blogs and recipes today!

Tuesday, March 22, 2011

Going Batching! What it is I do

I know I have posted many times about batch parties. I love them and they are really my favorite part of Menus, Meals and More. I get to hang out with fun people, learn new things and show a couple of my favorite cooking techniques and help people ffed their families healthy meals in an economical way. What could be better? Ok well sometimes it is better when there is wine and snacks, but that makes everything awesome.

There have been posts in the past about what a participant does at a batch party, but I have never really detailed what it is that I do. Its more than just shopping and setting up..... A LOT more.

The first thing that I do is come up with a selection of recipes that contain somewhat similiar ingredients, but don't taste alike. This way there isn't a ton of wasted ingredients left in a bottle, but you don't get tired of eating the same thing over and over again. After everyone has chosen the recipe that they want to be responsible for assembling, I write down every ingredient of each recipe and multiply the amount by the number of people participating.  When recipes call for the same ingredient, I combine them. Most of the time this involves some conversion fun because one recipe will call for teaspoons and another will call for tablespoons, etc.  Once the ingredient list is made, I will look through the local warehouse stores website to see what they carry in various amounts and prices.  This also involves some math because they don't sell soy sauce by the tablespoon. I have learned a ton about how many cups of cheese are in a pound and how many pork loins are needed to make 48 chops!  Learning the price break on buying a case versus individual items also helps everyone save a ton of money.

After I make the list, I estimate the total cost of groceries add my fee and divide it up by the number of participants. This is the "buy-in" that  is due before I do the shopping. The host of the party is responsible for collecting this. Most of the time I know the participants and they end up bringing me to the money, but I really need to delegate this more as a host duty.

Anyway after the buy-in is collected, I go to the various stores where I can find the best deals on the ingredients. Sometimes this includes going to Sam's Club, HEB, the local farmers market and Asian grocery store. The shopping usually takes me 2 full days and then I spend at least one day prepping. I butcher whole pork loins to make chops and roasts and trim all the chicken myself. There is a significant cost benefit to the participants when I do this, but it does take some time. I also mix fillings and chop veggies so that things just have to be assembled on party night.


On the day of the party, I come to the hosts house with tables and all of the food. I set up the tables and "stations" for each participant. Ideally, when the participants arrive all of their ingredients are set out for them with a copy of their chosen recipe. We hang out, chitchat, make up some meals and have a great time. I am there to help when needed, show techniques, run out for needed ingredients and kind of "conduct" the assembling. After everyone is done, I clean up and we settle up any differences in the estimated cost versus the actual cost of groceries.  Everyone goes home with a bunch of meals to stuff their freezer and a bit less stress. How could I not love this?

Monday, March 21, 2011

Meatless Monday - Spinach and Chickpea Pasta Toss

I have really been trying to find some GOOD vegetarian meals that will satisfy my meat eating family and  bring them around to the Meatless Monday idea.  What better way to do that than to incorporate their favorite ingredients?

My kids are huge fans of pasta and creamy sauces. The only problem is that  several of the recipes I have tried for meatless pasta dishes are not very hearty.  I started thinking of maybe finding something with beans when I ran across this dish on Foodnetwork.com. Emeril Lagasse's recipes for Pasta with chickpeas and spinach seemed like a great place to start.

I tweaked the recipe a bit to fit more into what my kids would like and lightened it up a bit to make myself feel better.

Here are the changes I made.

Ingredients


1 pound fusilli or penne
2 tablespoons olive oil
1 1/4 cups chopped red bell peppers
1 cup chopped yellow onions
2 tablespoons minced garlic
1/2 teaspoon red pepper flakes
1 1/4 teaspoons salt
1/4 teaspoon pepper
2 cups vegetable stock, or canned vegetable broth
1 (15-ounce) can chickpeas, rinsed and drained
16 ounces fresh baby spinach, rinsed well and stems removed
1/2 cup grated asiago

Directions

Bring a large pot of salted water to a boil. Add the pasta and cook until al dente, about 8 minutes. Drain well.


Meanwhile, in a large skillet, heat the oil over medium-high heat. Add the bell peppers and onions, and cook, stirring, until soft, about 4 minutes. Add the garlic, red pepper flakes, salt and pepper, and cook for 1 minute. Add a bit of stock and stir to deglaze the pan. Add the rest of the vegetable stock and chickpeas and bring to a boil. Reduce the heat to low and simmer until the chickpeas are tender, about 5 minutes, and almost all the broth is gone. Crush the peas lightly with the back of a spoon against the side of the pot. Add the spinach and cook until wilted, about 2 minutes. Add the cooked pasta and toss well to coat. Adjust seasoning, to taste.

Photobucket


Add the cheese and toss to combine.


Photobucket


Divide the pasta among serving plates and serve immediately.


The meal was very creamy and flavorful. The kids didn't miss the meat or the extra cream in the sauce. I will be making this one again!!

Wednesday, March 9, 2011

Chinese Braised pork with Brown Rice and Asian beans

Photobucket

This is going to be a great one for batch parties. I placed all the ingredients in a foodsaver bag and put it in the freezer.  The night before I cooked it I pulled it out and put it in the fridge.

Photobucket

The entire contents of the bag were cooked in a slow cooker on low for 8 hours.
Photobucket
I put the fat side up so that it could be easily peeled off after it was done cooking.

Photobucket

Photobucket

The meat was incredibly moist and fell apart when I was cutting it. It really turned into a Chinese pulled pork. I served the meat over brown rice and topped with the cooking liquid. The flavor was sweet and mildly tangy - Delicious!!!!! Look for this on next month's batch party menus!!

Check out this and other recipes on Wanderfood Wednesday!


Braised Chinese Pork Loin


1 (3-pound) boneless pork loin, trimmed
1/4 cup chopped ginger
6 scallions, cut into 1-inch pieces
4 garlic cloves, minced
2 cups low-sodium chicken broth
1/4 cup low-sodium soy sauce
1/4 cup dry vermouth
2 teaspoons sugar
1 cinnamon stick
2 star anise


High: 1 hour; then low: 8 hours, or until pork registers 170°F.

Serves: 10


Pork Loin   Slow Cooker

Monday, March 7, 2011

Meatless Monday - Chickpeas and Artichoke Masala

During my time in isolation (with the flu) I caught up on many of my recorded TV shows. After watching about 15 episodes of Iron Chef America, I started looking for something different.  We have always been fans of The Next Food Network Star so I decided to catch up on some of the latest winner's shows, Aarti Party. This particular recipe really caught my eye. I have been looking for some really flavorful vegetarian meals and Chickpea and Artichoke Masala really caught my eye.

First, I made the ginger garlic paste in the food processor and  added the onion and tomato. Then the sauce was sauteed in cumin infused oil.
Photobucket


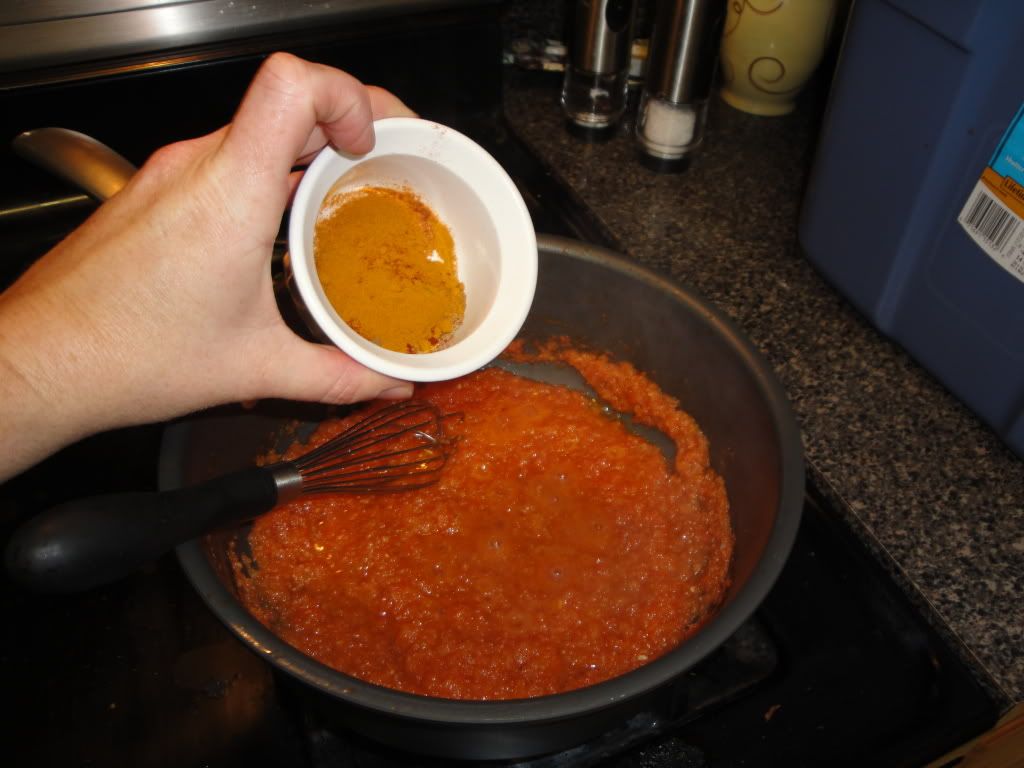
The sauce was allowed to cook for 10 minutes. Look how much deeper the color got. No more bright pink!
Photobucket
The spices were added and then the yogurt a bit at a time.

Photobucket

Finally, the chickpeas, artichokes and rest of the ingredients were added.
Photobucket

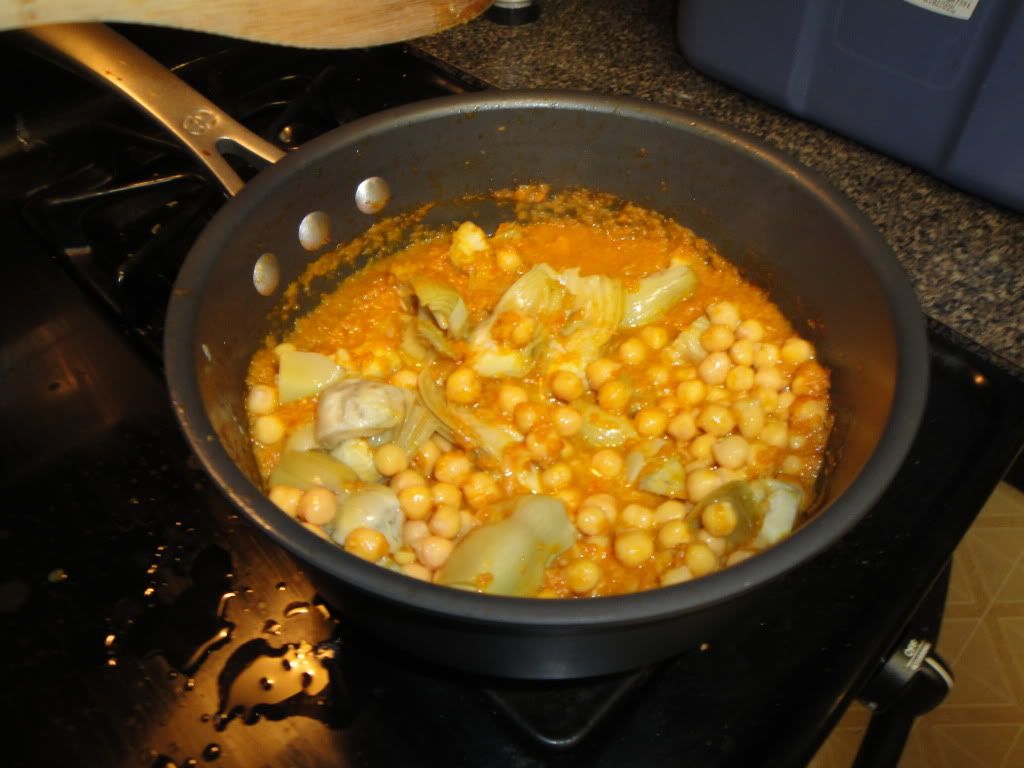
The sauce simmered for 10 minutes.

Photobucket

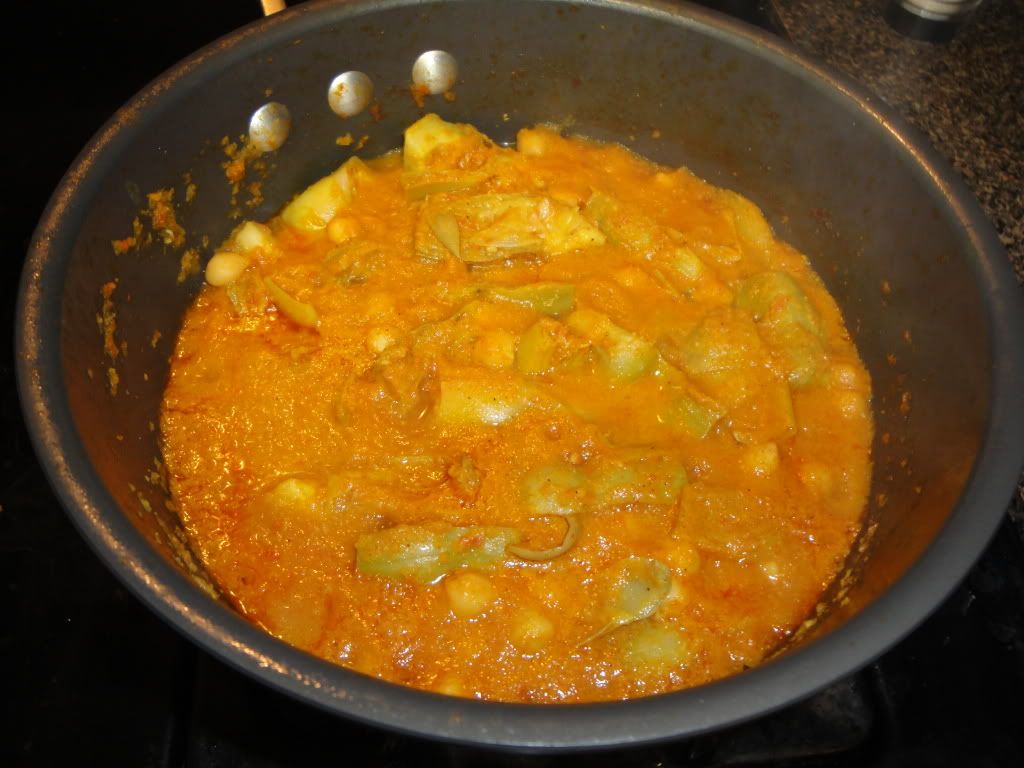
The finished dish turned out a bit more soupy than I expected so I served it with Basmati rice. The flavor of the spices really came through, without being overwhelming. The kids didn't really go for it, but I think it would make a great lunch recipe. I am not going to let this deter my Meatless Monday mission. the quest for great vegetarian meals is ON!!!!


Ingredients

1 large red onion, chopped (about 2 cups)
2 tablespoons Ginger-Garlic Paste, recipe follows, or 1 clove garlic and 1/2-inch piece ginger, peeled and chopped
3 large Roma tomatoes, chopped
2 tablespoons canola oil
1 teaspoon cumin seed
1 teaspoon ground coriander
1/2 teaspoon garam masala
1/4 teaspoon paprika
1/4 teaspoon turmeric
1/4 cup yogurt, whisked until smooth
1 tablespoon lime juice (about 1/2 a lime)
1 (14 1/2-ounce) can chickpeas, drained and rinsed
1 (14 1/2-ounce) can artichoke hearts, drained, rinsed, and halved
Kosher salt
1/2 cup water
Chopped fresh cilantro, for garnish

Directions

Process the onion, Garlic-Ginger Paste, and tomatoes in a food processor or blender until smooth.

Meanwhile, warm the oil in a large skillet over medium-high heat. Once the oil is shimmering, add the cumin seeds. Once they're done popping, add the onion-tomato paste you just made, and saute until it thickens and deepens in color, about 10 minutes.

Add the ground coriander, garam masala, paprika, and turmeric and saute about 30 seconds. Then add the yogurt, a little at a time so it doesn't curdle. Stir in the lime juice, chickpeas, artichokes, salt, to taste, and water. Cover and simmer 10 minutes. Taste for seasonings and serve garnished with cilantro


Ginger-Garlic Paste:

1/2 cup cloves garlic, whole
1/2 cup fresh ginger, peeled, 1/2-inch slices
1/4 cup canola oil

Throw the garlic, ginger, and canola oil in a mini-food processor and let it go until it forms a semi-smooth paste. There will still be tiny little pieces in there, but overall, it should resemble a paste.

Save what you don't use in a small glass jar. It should last in the fridge for 2 to 3 weeks. It's a delicious addition to marinades, pasta sauces, stir fry sauces, slow-cooker recipes, gravy etc. We always had a jar of this stuff in our fridge growing up.

Sunday, March 6, 2011

Week 10- Another Really Delicious Week

This week is full of great meals. I am cooking for clients again and it will be a collection of wonderful meals that I am making doubles of for us.


Sunday: Braised Chinese Pork with brown rice and Asian green beans
Monday: Halibut with Tomatoes, Feta and Mint and Sundried Tomato Couscous
Tuesday: Tandoori Chicken with Mango Relish and Basmati rice
Wednesday: Irish pork with Potato Stuffing and Cabbage
Thursday: Bobotie and Root Vegetable Mash
Friday: Chickpeas and Artichoke Masala with Root Vegetable Jumble
Saturday: Chicken Creole

Thankfully, I had some of ingredients, but this what my list looked like for this meal.

4 onion

Bell pepper
2 potatoes
Parsips
2 turnips
Carrots
Lemon
Fennel bulb
2 large cooking apples
Fresh sage
Cabbage
1 mango
3 Red onion
3 roma tomato
grape tomatoes
kalamata olives
baby spinach
mint
ginger
Fruit
¼ cup slivered almonds
2 oz dried apricot
2 slices white bread
Milk
Feta
2 1/2 cups plain yogurt
Red wine vinegar
14 oz whole tomatoes
2 cans diced tomato
Can chickpeas
Can artichoke hearts
Basmati rice
1 lb ground beef
4 lbs boneless skinless chicken breasts
2 pounds halibut
4 pounds pork loin


Look for posts to come on these great meals!

Friday, March 4, 2011

Curried Lamb and Lentils

This dish will make your house smell so warm and inviting. As the Curried Lamb and lentils were cooking, it took a ton of restraint not to bust into the pot and gobble it up. I don't know what it is about curry, but it is one of my favorite comfort foods. 

Living in small town Texas can make it hard to find some ingredients, but the nice butcher at the local HEB was kind enough to cut a leg of lamb into steaks for me. They were only about a 1/4 inch thick so they cooked really quickly and took on all the flavors of the spices.

First the lamb steaks were browned on each side. Then carrots, celery and onions were added.

Photobucket

After the onions start to become clear and the carrots get soft, the spices were added.

Photobucket

Then the broth and lentils were added. Cook until the lentils start to become soft.
 Photobucket

Serve over rice! Doesn't it look good.
Photobucket


Not only did this dish smell wonderful, but it tasted amazing. I chose to cool and freeze this meal for a later dinner and it reheated very well.  This is definitely going to be a feature on some future premade special  menus.

Check out this recipe and others like it on http://foodtripfriday.net/

Curried Lamb and Lentils

Serves 6

10 lean boneless lamb leg steaks about 1 3/4lbs
1 medium onion chopped
3 medium carrots, diced
1 celery stalk, chopped
1 tbsp hot curry powder
2 tbsp tomato paste
2 cups broth
1 cup green lentils
Salt and pepper
Boiled rice

In a large nonstick pan, cook the lamb steaks without fat until browned, turning once.
Add vegetables and cook for 2 minutes, then stir in the curry paste, tomato paste, broth and lentils.
Bring to a boil, cover and simmer gently for 20 minutes. Cool completely then bag and freeze.
Thaw and heat in skillet with a bit more broth for 15 minutes.

Serve over rice.

Lamb